Struggling to figure out how to get to Odaiba? I get it – Tokyo’s train system can be overwhelming, especially when you’re trying to reach this man-made island. After multiple trips there myself, I’ve discovered the quickest routes that will save you time and confusion.
Many tourists waste hours trying to navigate to Odaiba only to get lost between train transfers. Don’t be one of them! This guide breaks down the simplest ways to reach Odaiba from popular Tokyo locations.
What’s the fastest way to reach Odaiba?
The answer depends entirely on where you’re coming from. Let me break it down by starting point:
From Shinjuku to Odaiba (35-40 minutes)
- Take the JR Yamanote Line to Shimbashi Station (25 mins)
- Transfer to the Yurikamome Line to Odaiba (15 mins)
- Cost: ¥570 (¥220 for JR + ¥350 for Yurikamome)
The Shinjuku to Odaiba route is one I’ve taken countless times, and it’s surprisingly straightforward despite Shinjuku Station’s massive size. Head to the JR East entrance (look for the green JR signs) and find the Yamanote Line platform – it’s the loop line that circles central Tokyo.
The trains are fairly frequent, running every 3-5 minutes during daytime, so you won’t wait long. When you arrive at Shimbashi, follow the clearly marked signs to the Yurikamome Line (they’re in English) and take the escalators up to the elevated platform.
The Yurikamome platform can get crowded during weekends, so try to travel on weekdays if possible for a more comfortable ride.
Pro tip: If you have a JR Pass, the first leg is covered, saving you ¥220! This makes Odaiba one of the more economical day trips from Shinjuku.
From Shibuya to Odaiba (30-35 minutes)
- Take the JR Yamanote Line to Shimbashi Station (15 mins)
- Transfer to the Yurikamome Line to Odaiba (15 mins)
- Cost: ¥540 (¥190 for JR + ¥350 for Yurikamome)
Traveling from Shibuya to Odaiba is actually faster than from Shinjuku, which surprises many tourists who end up taking longer routes.
At Shibuya Station, look for the JR entrance near the famous Hachiko statue – it’s usually packed with people but moves quickly. The Yamanote Line platforms are clearly marked, and you’ll want to head in the direction of Tokyo Station (not Shinjuku).
The ride to Shimbashi is quick and comfortable, with trains typically arriving every 4 minutes during peak hours. Once at Shimbashi, you’ll need to exit through the ticket gates and follow signs for the Yurikamome Line transfer, which takes about 5 minutes of walking through corridors that can be confusing without proper signage.
From Asakusa to Odaiba (40 minutes)
- Take the Asakusa Line to Shimbashi Station (25 mins)
- Transfer to the Yurikamome Line to Odaiba (15 mins)
- Cost: ¥580 (¥230 for subway + ¥350 for Yurikamome)
The journey from Asakusa to Odaiba offers a fascinating contrast that I love experiencing every time. From Asakusa Station, you’ll want to find the Toei Asakusa Line (not to be confused with the Tokyo Metro Ginza Line which is also at Asakusa).
The Asakusa Line trains have comfortable seating and are usually less crowded than the JR lines, giving you a chance to rest before your Odaiba adventure. The ride to Shimbashi takes about 25 minutes with several stops along the way, showing you different neighborhoods of Tokyo.
When transferring at Shimbashi, follow the blue Yurikamome signs which will lead you up to the elevated train that offers spectacular city views.
Alternative: Take the water bus directly from Asakusa to Odaiba (55 mins). It costs ¥1,560 but gives you amazing views and zero transfers! The water bus pier is located near Azumabashi Bridge, about a 5-minute walk from Asakusa Station.
This scenic cruise along the Sumida River lets you see Tokyo from a completely different perspective, passing under 12 uniquely designed bridges before entering Tokyo Bay.
The boats have both indoor and outdoor seating, though the outdoor deck offers the best photo opportunities of Tokyo Skytree and Rainbow Bridge that you’ll definitely want to capture.
From Akihabara to Odaiba (35 minutes)
- Take the JR Yamanote Line to Shimbashi Station (20 mins)
- Transfer to the Yurikamome Line to Odaiba (15 mins)
- Cost: ¥560 (¥210 for JR + ¥350 for Yurikamome)
Combining a visit to geeky Akihabara with futuristic Odaiba makes for a perfect tech-themed day in Tokyo. To start this journey, head to Akihabara Station and look for the JR Yamanote Line platforms, which are usually on the upper level of the station.
You’ll want to take the train heading toward Tokyo Station (counterclockwise on the Yamanote loop), not toward Ueno. The ride to Shimbashi is direct with no transfers needed, though the train can get extremely crowded during rush hours (7:30-9:00 AM and 5:00-7:00 PM), so try to avoid these times if possible.
Once at Shimbashi, the transfer to the Yurikamome isn’t complicated but requires exiting through the JR gates and walking about 3 minutes to the separate Yurikamome station entrance.
From Tokyo Station to Odaiba (25 minutes)
- Take the JR Yamanote Line to Shimbashi Station (8 mins)
- Transfer to the Yurikamome Line to Odaiba (15 mins)
- Cost: ¥500 (¥150 for JR + ¥350 for Yurikamome)
Tokyo Station to Odaiba is one of the quickest routes and one I recommend if you’re arriving by Shinkansen or airport train. Tokyo Station is massive and can be disorienting, so look for the green JR signs and specifically the Yamanote Line platforms (track numbers 1-4) on the ground floor.
You’ll want to take the Yamanote Line in the clockwise direction (toward Shinagawa) – just 2 stops to Shimbashi. The trains run incredibly frequently, sometimes every 2 minutes during peak hours, making this part of the journey virtually wait-free.
The short distance means you’ll almost always get a seat outside of rush hour, giving you a chance to check your Odaiba itinerary before arriving at the transfer point.
From Shimbashi to Odaiba (15 minutes)
- Take the Yurikamome Line directly to Odaiba (15 mins)
- Cost: ¥350
Shimbashi to Odaiba is the most direct route and my personal favorite starting point when I’m showing friends around Tokyo. Shimbashi Station itself is relatively compact compared to the monster stations like Shinjuku, making it much less intimidating for first-time visitors to Tokyo.
The Yurikamome Line station is actually separate from the main JR station – to find it, exit the JR station from the Shiodome exit and look for the elevated tracks and escalators going up. Unlike most Tokyo trains, the Yurikamome has no driver and runs completely automatically, which adds to the futuristic feel that perfectly complements an Odaiba visit.
The train makes a dramatic curve as it approaches Rainbow Bridge, providing spectacular views of both Tokyo Bay and the city skyline that you simply can’t get from any other public transportation in Tokyo.
The Yurikamome Train Experience
The Yurikamome train is actually worth talking about. This fully automated train offers incredible views as it crosses Rainbow Bridge. Try to get a seat at the very front for the best view (it’s driverless, so the front seats have panoramic windows).
I always make sure to grab these seats if possible, as the sweeping vista of Tokyo Bay, especially at sunset, has made even my most jaded Tokyo friends pull out their cameras in excitement.
The train itself is quieter and smoother than regular Tokyo trains, with wide windows designed specifically for sightseeing rather than just commuting.
The Yurikamome makes a dramatic 270-degree loop as it approaches Odaiba, giving you a spinning panorama of the Tokyo skyline that no other public transport offers.
This unique design element was intentional – engineers could have built a straight route, but they chose this looping path specifically to showcase the bay views.
Watch for the moment when Tokyo Tower and Rainbow Bridge align perfectly – it’s one of the most Instagram-worthy urban transportation views in the world and happens about 10 minutes into your journey from Shimbashi.
Yurikamome fare from Shimbashi to Odaiba stations:
- Odaiba-Kaihinkoen: ¥350
- Tokyo Teleport: ¥380
- Aomi: ¥380
Specific Odaiba Destinations
Depending on where you’re heading in Odaiba, you’ll want to get off at different stations:
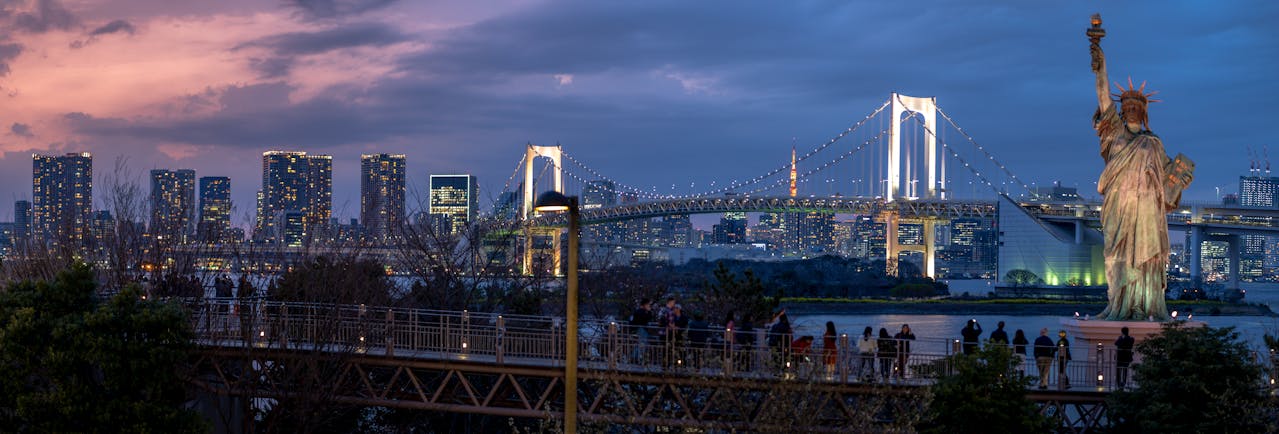
- Odaiba-Kaihinkoen Station (Yurikamome): For Odaiba Beach, Statue of Liberty, TeamLab Borderless
- Tokyo Teleport Station (Rinkai Line): For DiverCity (Gundam), Venus Fort, Palette Town
- Aomi Station: For Miraikan Science Museum, Mega Web Toyota
Odaiba-Kaihinkoen Station is my recommended first stop for most visitors since it puts you right by the beach and the iconic miniature Statue of Liberty. The station exits directly to a seaside promenade with incredible Rainbow Bridge views and is significantly less crowded than Tokyo Teleport Station.
It’s an easy 10-minute walk from here to most other Odaiba attractions, with clear signage in English pointing you toward major spots. The area around this station is more open and peaceful, making it perfect for those Instagram shots without crowds photobombing your pictures.
Tokyo Teleport Station serves the massive shopping complexes and is usually bustling with local teenagers and families, especially on weekends when the wait for the Gundam statue shows can exceed 30 minutes.
This station connects to the Rinkai Line which runs to western Tokyo, making it useful if you’re coming from Shinjuku without wanting to transfer at Shimbashi.
While more crowded, this station has excellent facilities including coin lockers, multiple restrooms, and a tourist information center where you can pick up English maps of the area.
Aomi Station is the least used of the three but provides the most direct access to the educational attractions of Odaiba. The Miraikan science museum is just a 3-minute walk from the exit, while Toyota’s Mega Web showcase is about 5 minutes away.
This station tends to be quieter even during peak tourist season, making it a good choice if you’re visiting with young children or prefer to avoid crowds. The area around Aomi has wider walkways and more open spaces, creating a less hectic atmosphere than the shopping districts.
Money-Saving Tips
- Use a Suica/Pasmo card – saves you time buying individual tickets and sometimes gives small discounts
- JR Pass holders – use your pass for the JR portions of your journey
- Consider a Tokyo Subway 24/48/72-hour ticket – but know it won’t cover the Yurikamome line
Investing in a Suica or Pasmo card will save you significant time and hassle when traveling around Tokyo, including to Odaiba.
These rechargeable IC cards eliminate the need to purchase individual paper tickets for each journey, which can be confusing with Tokyo’s complex fare structures. I’ve calculated that using these cards saves about 5-7 minutes per station visit, which adds up quickly during a busy day of sightseeing.
The cards also work for vending machines, convenience stores, and many restaurants, turning them into all-purpose spending tools that streamline your entire Tokyo experience.
JR Pass holders should strategically plan their Odaiba visit to maximize the value of their pass. Since the pass covers all JR lines but not the Yurikamome, try to bundle your Odaiba trip with other JR-accessible destinations on the same day.
For example, you could visit Akihabara in the morning (JR Yamanote Line), then Odaiba in the afternoon, and finish in Shinjuku for dinner – paying only for the Yurikamome portion while covering substantial distances on your JR Pass.
This approach can save you upwards of ¥1,000 per day compared to purchasing separate tickets for each leg.
The Tokyo Subway tickets (available at Haneda and Narita airports) offer unlimited rides on Tokyo Metro and Toei Subway lines, which is great value for heavy transit users. However, these passes exclude the Yurikamome Line to Odaiba and the JR lines, creating a potential gap in your coverage.
I’ve found that these passes work best for travelers who are primarily exploring central Tokyo areas like Shibuya, Shinjuku, and Ueno, with perhaps just one trip to Odaiba during their stay. Calculate carefully whether your planned routes justify the pass cost versus individual fares, especially if Odaiba is a major destination for you.
Common Mistakes to Avoid
- Not checking the last train times – Yurikamome ends earlier than you might expect (around midnight)
- Confusing the Rinkai Line with Yurikamome – they serve different parts of Odaiba
- Relying on taxis – extremely expensive from central Tokyo (¥5,000+)
Missing the last Yurikamome train is a mistake that can ruin an otherwise perfect day at Odaiba, leaving you stranded with limited options. The last train typically departs Odaiba-Kaihinkoen station around 11:45 PM on weekdays and slightly later on weekends, much earlier than many visitors expect.
I’ve witnessed numerous tourists frantically running for the last train or facing the harsh reality of an expensive taxi ride back to their hotel.
Always check the exact last train time at the station when you arrive, or save the timetable on your phone – especially important if you’re planning to watch the evening Gundam shows or have a late dinner with bay views.
Confusing the Rinkai Line with the Yurikamome Line is a surprisingly common error that can add unnecessary time to your journey.
While both lines serve Odaiba, they operate on completely different routes and fare systems. The Yurikamome is elevated with great views and serves the eastern parts of Odaiba including the beach area, while the Rinkai Line is underground and connects directly to the shopping complexes.
I’ve encountered numerous tourists who accidentally took the Rinkai Line from Osaki instead of the Yurikamome from Shimbashi, ending up far from their intended destination and adding 30+ minutes to their journey. Always confirm which line best serves your specific Odaiba destination.
Taking taxis to Odaiba is a financial mistake that can devastate your travel budget. The isolated location across Tokyo Bay means taxi fares from central areas like Shinjuku or Shibuya often exceed ¥5,000 ($45) each way – sometimes reaching ¥7,000 during late hours or heavy traffic.
I’ve met travelers who spent their entire day’s budget on a round-trip taxi journey when they could have used that money for experiences or shopping in Odaiba. Even worse, taxis can get stuck in Rainbow Bridge traffic during peak hours, turning a 15-minute train ride into a 45-minute meter-running nightmare.
Save taxis for emergencies only, like when you’ve missed the last train and are traveling with a group to split costs.
Getting to Odaiba seems complicated at first, but once you do it once, you’ll realize it’s pretty straightforward. The Yurikamome Line is the most scenic option and worth the fare just for the views across Rainbow Bridge.
I’ve taken hundreds of visitors to Odaiba over the years, and without exception, everyone agrees that the journey itself becomes a memorable part of the Odaiba experience. The futuristic, driverless train curving through Tokyo’s skyline perfectly sets the mood for exploring this ultra-modern artificial island that showcases Japan’s vision of the future.
Remember that Google Maps works perfectly in Japan, so don’t hesitate to use it for real-time navigation. Just make sure you have enough battery life before setting out! Unlike some countries where mapping apps struggle with public transit, Google Maps in Japan shows precise platform numbers, accurate fare information, and even alerts about delays.
I recommend downloading the Tokyo area for offline use before your trip and setting your hotel as a saved location. This simple preparation has saved countless travelers from getting lost in Tokyo’s complex transit network, especially when returning to their accommodation after a long day of exploring Odaiba’s futuristic attractions.
The transportation infrastructure connecting Odaiba to central Tokyo perfectly demonstrates Japan’s commitment to efficient public transit. While the island may look isolated on a map, the reality is that it’s more accessible than many neighborhoods within other major cities around the world.
The multiple route options from various Tokyo districts ensure that no matter where you’re staying, you’re likely just 30-40 minutes away from this unique entertainment district. Each transportation method offers a different perspective of Tokyo – the elevated Yurikamome showcases the skyline, the Rinkai Line provides efficient access to the western attractions, and the water bus offers a relaxing maritime approach that connects Odaiba’s modern landscape with traditional areas like Asakusa.